Building a Cold Frame: A Step-by-Step Guide to Growing Success
Hey there, green thumbs! Ever wished you could give your plants a head start in the season, or maybe extend their growing time a little longer? Well, guess what? You can! It's all thanks to the magic of a cold frame. Think of it as a mini greenhouse, a cozy haven for your seedlings, and a way to beat the chilly weather. Let's dive in and build one together!
What Exactly is a Cold Frame?
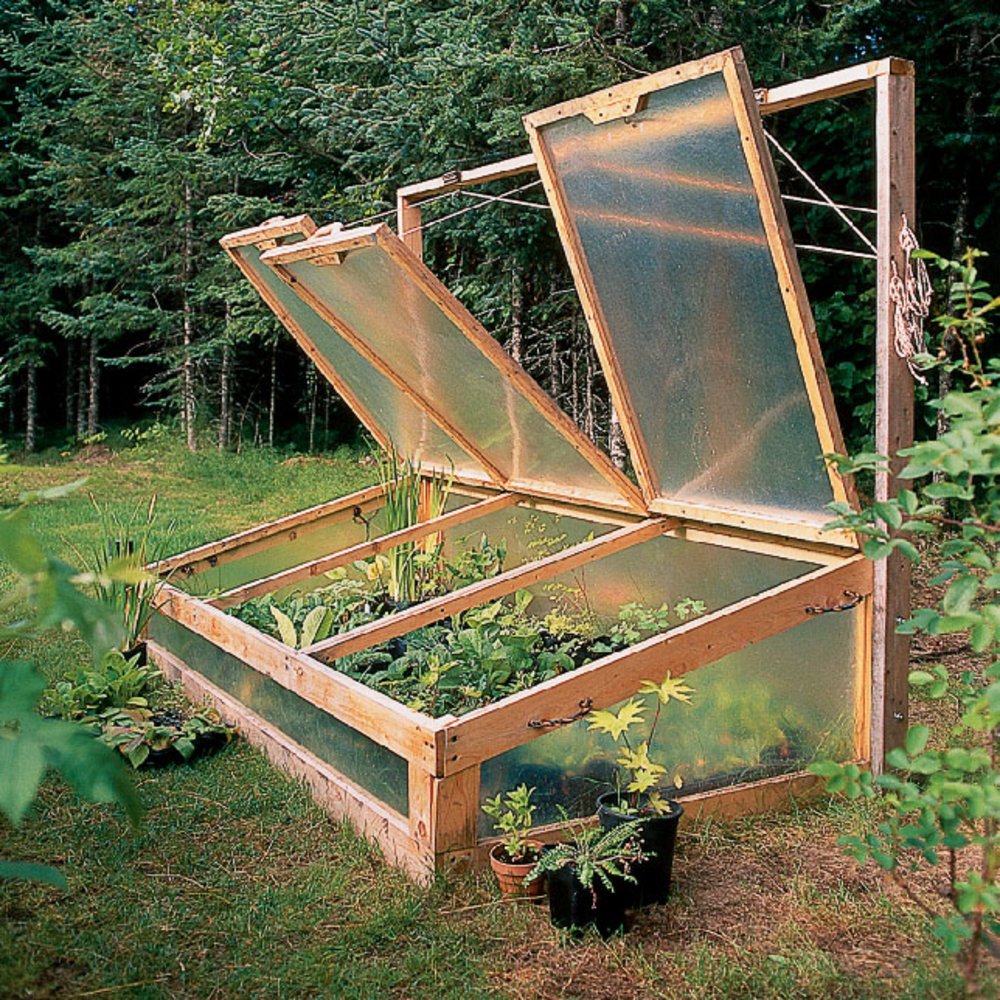
A cold frame is essentially a box with a transparent top, usually made of glass or plastic. This little structure traps the sun's warmth, creating a microclimate inside that's warmer than the surrounding air. It's perfect for starting seeds, hardening off seedlings (getting them used to outdoor conditions), and extending the growing season for cool-weather crops.
Why You Need a Cold Frame
Alright, so you're probably thinking, "Why bother with a cold frame?" Well, here's the deal: it's a gardener's best friend!
- Early Start: Get a jump on the season! By starting seeds indoors and then transplanting them into the cold frame, you can get your plants growing weeks earlier than if you were to plant them directly in the garden.
- Seedling Protection: Cold frames provide a shield against harsh winds and cold temperatures, making them perfect for delicate seedlings that are just getting started.
- Extended Season: Keep your plants growing longer! Cold frames can help extend your harvest into the fall by providing a warm haven during cooler months.
- More Options: You can even experiment with growing certain plants that might not thrive in your climate without a cold frame.
Choosing the Right Spot for Your Cold Frame
Before you get your hands dirty with building, you need to choose the ideal location for your cold frame. Here's what to keep in mind:
- Sunshine: Look for a spot that receives at least 6 hours of sunlight per day, preferably more. You want to maximize the sun's warmth inside the frame.
- Drainage: Make sure the spot is well-drained. You don't want your cold frame to become a soggy swamp, which can harm your plants.
- Accessibility: Choose a spot that's convenient for you. You'll be visiting your cold frame regularly to check on your plants, water, and tend to them.
Cold Frame Construction: Let's Get Building!
Now that you've picked your spot, let's get down to business and build your cold frame!
Materials You'll Need
To build a basic cold frame, you'll need the following:
- Wood: You can use treated lumber for the frame or even recycled wood for a more rustic look. You'll need planks for the sides and bottom, and additional pieces for support and bracing.
- Glass or Plastic: You'll need something clear to cover the top of the frame and let in the sunlight. You can use glass panes, polycarbonate sheets, or even heavy-duty plastic.
- Screws and Nails: For securing the wood pieces together.
- Hinges: To allow you to open and close the top of the frame for access and ventilation.
- Hardware Cloth: For covering the bottom of the frame to prevent weeds from growing up through the soil.
- Potting Soil: This is what your plants will grow in.
Step-by-Step Instructions
Let's build!
- Construct the Base: Cut the wood to the desired size for your cold frame. Typically, a cold frame should be at least 3 feet wide and 4 feet long. Make sure the base is level. Secure the bottom and sides together using screws or nails.
- Build the Sides: Attach the side planks to the base, creating the walls of your cold frame. You'll need to create a slightly angled frame so that the top can be opened.
- Add a Lid: Create a separate frame for the lid, using wood and hinges. This will be the cover of your cold frame.
- Attach the Cover: Secure the cover to the cold frame with hinges. You want to ensure that it opens smoothly and securely.
- Install Hardware Cloth: Staple or nail hardware cloth to the bottom of the frame, creating a barrier against weeds.
- Add the Glass or Plastic: You can secure your glass or plastic to the lid using wood strips, or even just using a frame that you attach to the lid.
- Set Up and Fill: Place the cold frame in your chosen location. Add a layer of potting soil to a depth of at least 6 inches.
Using Your Cold Frame
Now that your cold frame is built, let's put it to work!
Starting Seeds
Fill your cold frame with potting mix. Sow seeds directly into the soil or use individual seed trays placed inside the frame. Keep the soil consistently moist, and give your seedlings plenty of light.
Hardening Off Seedlings
Once your seedlings have grown strong enough, you'll need to slowly acclimate them to outdoor conditions, a process called hardening off. Gradually expose them to more time in the cold frame, increasing the amount of time they spend outside each day.
Extending the Season
Plant cool-weather crops like lettuce, spinach, kale, and radishes in your cold frame during the cooler months. You can also start fall-planted crops like garlic and onions.
Ventilation and Maintenance
It's important to provide adequate ventilation to your cold frame. On warm days, open the lid to allow excess heat to escape. Remove any dead leaves or weeds that may appear, and ensure that the soil remains moist but not waterlogged.
Cold Frame Variations: Get Creative!
Don't be afraid to get creative with your cold frame design! You can adapt it to your specific needs and resources.
- Wall-Mounted: You can build a cold frame against a wall to create a more compact design.
- Miniature: Use smaller pieces of wood to create a miniature cold frame perfect for starting a few plants.
- Reusable Materials: Look for repurposed materials like old windows or even plastic bottles to build your cold frame.
Get Growing!
There you have it â€" a step-by-step guide to building and using a cold frame. It's a fantastic way to extend your gardening season, get a jump on spring planting, and even save money on your grocery bill. So, get out there, build your cold frame, and get growing! Happy gardening!
0 comments:
Post a Comment
Note: Only a member of this blog may post a comment.